MGCB Editor Tutorial: The Cornflower Blue Sky’s Not the Limit
Objectives:
- Load content using the MGCB
- Utilize the Draw function to display loaded content
- Move a playable character about the play field
- Animate the character
Assets
All needed images and assets for this tutorial can be found at http://www.cs4730.org/assets/mgcb-tutorial/mgcb-tutorial-assets.zip. Assets are used with permission under Creative Commons license (see license.txt in the archive).
MGCB
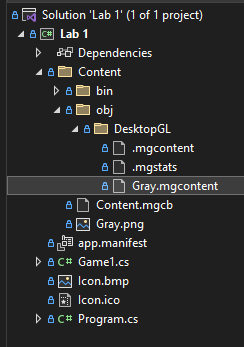
Expand the file tree under Content on the sidebar to reveal Content.mgcb. This is the MonoGame Content Builder [“MGCB”]. It takes visual and audio media and converts them so that MonoGame can utilize them.
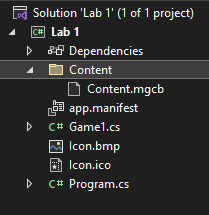
Right click on Content.mgcb and select “Open With…”
-
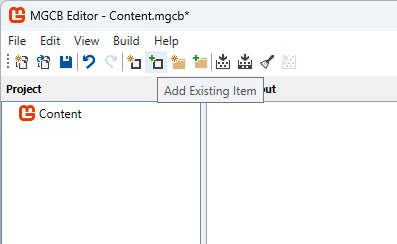
Windows Users: – The MGCB Editor should be the top choice and the default option, but if not, it is advised to find it and set it to the default. In the future, double-clicking “Content.mgcb” from the file tree will allow access to the MGCB. – In the MGCB, select “Add Existing Item” and navigate to where you saved this Mission’s assets. – Select the
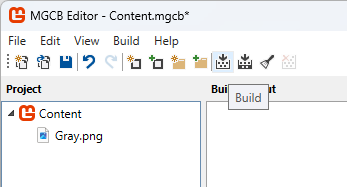
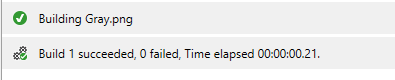
Gray.pngfile from the Backgrounds, Open it, and let MGCB copy the file to the directory. Then hit “Build.” – It should complete with no errors. When this has finished, you may close the MGCB. -
Mac Users: – Select the MGCB Editor (3.8.1.303) from the menu. – Under Edit - > Add -> Existing Item… and navigate to where you saved this Mission’s assets. – Select the
Gray.pngfile from the Backgrounds, open it, and let MGCB copy the file to the directory. – Then Build -> Build. – It should complete with no errors. When this has finished, you may close the MGCB.
Draw
In Game1.cs, we need to initialize, load, and then draw the new background. To do so, first initialize the background as a Texture2D in the Game1 class below the GraphicsDeviceManager and SpriteBatch.
private GraphicsDeviceManager _graphics;
private SpriteBatch _spriteBatch;
// initialize the background; we can call this whatever we want
Texture2D background;
Next, load the content which takes place conveniently enough in the LoadContent() method.
background = Content.Load<Texture2D>("Gray");
Here, background matches what was initialized, and “Gray” matches what the file is named in the MGCB (it automatically assumes the file extension is .mgcb).
Next, in the Draw() method, add the following:
_spriteBatch.Begin();
_spriteBatch.Draw(background, new Vector2(0, 0), Color.White);
_spriteBatch.End();
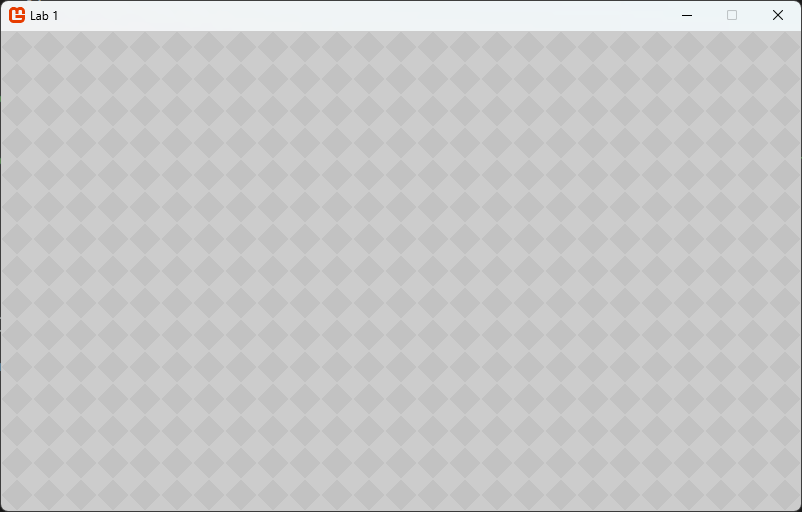
This will start the sprite drawing sequence, draw the background texture at position (0,0)–where (0,0) is the top left corner—mask it with white which is the image’s “default” coloring, and then end the sprite drawing. If you hit play, you’ll notice that there’s only one tile of our gray background showing on a large cornflower blue field. Not ideal. Let’s fix that.
We can try doing something like this instead:
_spriteBatch.Draw(background, new Rectangle(0, 0, GraphicsDevice.Viewport.Width,
    GraphicsDevice.Viewport.Height), Color.White);
This puts our background image into a Rectangle object that has starting coordinates of (0,0) and has the same width and height as the viewport, stretching the Texture to make it fit. This is probably not what we want to do, either.
Instead, have the draw method repeatedly draw the background to cover the whole playfield.
// repeating tile version
int xrepeats = GraphicsDevice.Viewport.Width / background.Width;
int yrepeats = GraphicsDevice.Viewport.Height / background.Height;

for (int i = 0; i <= xrepeats; i++) {
    for (int j = 0; j <= yrepeats; j++) {
        _spriteBatch.Draw(background, new Vector2(i*background.Width, j*background.Height), Color.White);
    }
}
We can access Textures' properties, like their width and height, directly instead of trying to determine it ourselves.
Now load in a playable character. In MGCB, choose your character from among the four provided, select their RunRight (32x32) image, and select re-build this time (this checks to make sure that everything that’s supposed to be in the folder is still in the folder.) Follow the same code as before as to initializing, loading, and drawing the sprite at location (0,448).
Take note: MonoGame executes and draws from top-down in your code, so the order of your Draw statements matters. You can use that to your advantage (overlapping and parallax effects.)
Hitting play you’ll notice that your character is at the bottom of the screen in 11 different frames of running. This is a sprite sheet, and MonoGame can draw individual frames of it.
To do this, the Draw() method can also be passed a Rectangle:
_spriteBatch.Draw(runAnim, new Vector2(0, 448), new Rectangle(0, 0, 32, 32), Color.White);
The Rectangle designates the portion of the Texture that is to be drawn. When you hit Play, you should now see only one frame of the character at the bottom of the playfield.
Movement
Since this is a game, the character will likely need to be able to move about the playfield.
First, initialize two variables: a Vector2 for the player’s position and a variable for their movement speed.
Vector2 playerPosition = new Vector2(0, 448);
int speed = 5;
Under the Update() method, there’s sample code already for how to handle input from the player using a gamepad or a keyboard.
Following the pattern below, copy and paste the code to make separate conditional statements for each of the four cardinal directions.
// handles GamePad up input and Keyboard up key.
if (GamePad.GetState(PlayerIndex.One).DPad.Up == ButtonState.Pressed || Keyboard.GetState().IsKeyDown(Keys.Up))
The playerPosition vector has accessible X and Y components, so adding or subtracting values as appropriate in the following way will take the player’s input and translate it into character movement:
playerPosition.Y += speed;
Ideally these statements will be checked and executed 60 times a second, so pressing Down for 1 second will result in the character moving 60 frames per second * 5 pixels = 300 pixels per second. You can (and should) change the speed to see how much it can differ.
Note: If you want to declare decimal values in C# you need to append the value with either “f” for floats or “d” for doubles.
You may also notice that the character can move outside of the playfield.
Bonus Objective: Prevent the character from leaving the playfield.
Animation
Now that the character can move around, animate the sprite using the whole sprite sheet.
Declare an array of Rectangles, a variable to keep track of the time passed, a variable to declare how fast our animation should play, and a variable to keep track of which frame of the animation we are on.
Rectangle[] runAnim;
float timer;
int animSpeed;
int animationFrame;
Load these in the Load() method.
timer = 0;
animSpeed = 200;
animationFrame = 0;

runAnim = new Rectangle[12];
for (int i = 0; i < 12; i++) {
    runAnim[i] = new Rectangle(i * 32, 0, 32, 32);
}
The creator of these sprite sheets only provided one direction for running. We could ask MonoGame to render the mirror image every frame, but it would have to perform that calculation every frame which could reduce our overall framerate. Since space is not a concern for this project, we have provided MonoGame with an already mirrored version.
Utilize these new variables in the Update() method.
// player animation
if ( timer > animSpeed)  // check if it's time to change the frame
{
    if (animationFrame < 11)
    {
        // if it's not at the end of the animation, go to the next frame
        animationFrame++;
    } else
    {
        // if it is at the end of the animation, restart at frame 0
        animationFrame = 0;
    }

    // reset the timer
    timer = 0;

}
else
{
    // if it's not time to change frames, increment the timer instead
    timer += (float)gameTime.ElapsedGameTime.TotalMilliseconds;
}
In the Draw() method, we can now dynamically tell it which Rectangle of the sprite sheet to draw.
_spriteBatch.Draw(runAnimRight, playerPosition, runAnim[animationFrame], Color.White);
If you hit Play, you might notice that the speed of the animation is off relative to the speed of movement. Try changing both the animSpeed and speed variables to make it more seamless.
The character is only able to visually run to the right, and if it’s not moving, the running animation still plays. How can we fix this?
First, update the MGCB with the RunLeft (32 x 32) image and load it into MonoGame as runAnimLeft.
Bonus Objective: Also load the Idle (32 x 32) asset and create a Rectangle array for it. It only has 11 frames of animation, so it cannot use the same array that the running animations do.
Next, create an integer direction variable where 0 is not moving, and 1 and 2 are left and right, respectively. This will keep track of which way the character is facing which will be used to change the animation playing.
int playerDirection;
In the Update() function, before checking GamePad and Keyboard inputs, make playerDirection default to 0—not moving—which will only be changed if the player inputs a direction.
Then, on the left and right input conditional statements, include a line to update the playerDirection variable to 1 or 2, respectively.
Now playerDirection can give us which way the character is facing.
With this, in the Draw() method, create a conditional that checks playerDirection and draws the appropriate Texture and its animation.
if (playerDirection == 1) {
    _spriteBatch.Draw(runAnimLeft, playerPosition, runAnim[animationFrame], Color.White);
} else if (playerDirection == 2) {
    _spriteBatch.Draw(runAnimRight, playerPosition, runAnim[animationFrame], Color.White);
} else {
    _spriteBatch.Draw(runAnimRight, playerPosition, new Rectangle(0, 0, 32, 32), Color.White);
}
The else statement is only going to draw the first frame of the running right animation as a placeholder for when the character is not moving left or right.
Bonus Objective: Incorporate the provided Idle animation by addressing the animation frame advancer, the Draw conditional, and what happens if the player stops moving on frame 12.
With that, you’ve built the beginnings of a platforming game.